How To Create Free a Website In Blogger Within 5 Minutes - Dremnews
What Is Blogger ?
Blogger is a free blog hosting service owner by Google. It was first developed by Pyra Lab & later bought by Google in 2003. Now Blogger is most popular free blogging site that gives the users unlimited free hosting under blogspot.com sundomain.
Start Blogging In Blogger :
If you want to start blogging or create a personal or business website You can do it by Blogger. Basically a blogger or website need a domain & a hosting site, where users need a yearly charge. But blogger is totally free site, where users can open a site under sub-domain (blogspot.com). Now Google dominate whole world over Internet related service, so this site is very secure for their users although it is a free service.
How to Start ?
Now I will show you how to create a free Blog or website without any trouble. You need just follow the instruction which I Share below this.
Firstly you should have to know that Blogger is hosted By Google, so it you want to create a site in Blogger, you must need a Google account. If you have it just Log In Your Google Account to start blogging.
Recommend : How to Register for Google Account ?
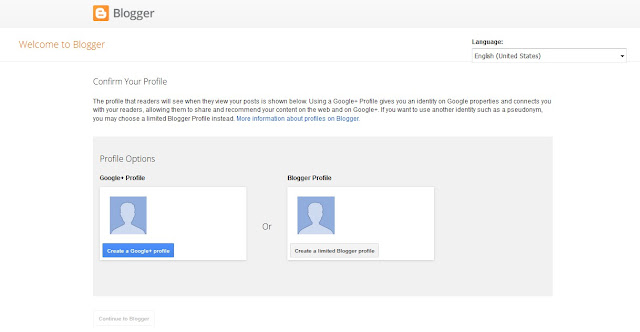
1. Now Click Here to go the site & you will get a page like the below photo. Now you should follow the instructions.

## Here google ask you that how you will select your blogger profile. If you want to create a blogger profile select Blogger profile or you can choose your Google+ ID for your blogger. After choose your blogger profile click on the Continue to Blogger Button.
2. Now follow the 2nd step of your site.

In this page just click on the New Blog button.
3. Now you will get a similar page like the below photo. Remind that it is a very important page for your blogger. Here you have to give your site name and description. When you choose your site name, you have to choose a name, that will easily memorize by users.

In this pop-up page in number 01, you have to give a title of your site. The title is limited 70 character. Title means that it is a short brief of your site. In number 02, give your site name. Here blogspot.com is permanent. You just type your site name before it. Keep your eyes on the below of site name. If your site name is unique you will show that ( This blog address is available). In the 3rd step you have to select a Template of your site. This template will be customized later. Now click on the Create Blog button.
4. Now your blog is ready to publish your post, videos & photos. You publish your post from anywhere anytime.
Now I will describe how to publish your post and understand the Menu Bar.

## In the top of the middle you will see a Button named View Blog. By this bar you redirect to your site.
## In the left side you will see some menu bar. In the top side you will see
New Post Button. You can write & Publish post.
## In the post bar you will find your all published & save post.
## In the page bar you easily get your all pages.
## Status bar is important for you because in here you will see that how many viewers visit your site. You get will find it Daily, Weekly, Monthly & Yearly. It has 4 Submenu, In traffic source you will get, how visitors come to site & In the Audience bar you will see Country wise visitors.
## Blogger support Adsense. A site owner earn money by google adsense. When you will be eligible for Adsense you can sign up with google adsense & will see your earn by Earning Bar.
## You can layout your site as you want by going to Layout Bar.
## In the Template bar you can customize your size. Like change color, front, size & many others.
## In the setting bar you can setting your blog language, mail & custom robot text. It will be critical for you in the first time. I will describe it broadly in the next post. Just keep your eyes in this site.
Now you get a primary idea about Blogger site. I hope you will be a successful blogger if you follow this site regularly and follow our all instructions.


